Tag Archives: save money

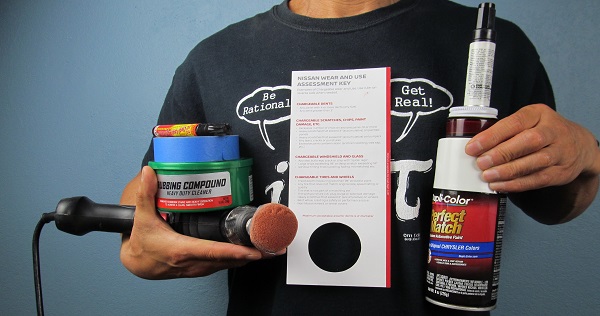
Save Money: Paint And Fix Your Car For The Lowest Cost

youtube

I am not fixing the car body to look 100% perfect, I am trying to save your money by presenting the cheapest fix. If you don’t fix the car, and you’re leasing it, you will not pass an inspection and the lease company will charge you. This will end up costing more. So I’m trying to show you the minimum amount of money needed to pass the leasing company’s inspection.

If the area is small you may use touch-up paint. However, it is unlikely the color will match even if the seller guarantees matching based on the color code. I will show you what to do if the paint you buy based on the color code does not match your car.

Conventional advice is that spray paint looks better. However, if you don’t do a good job, you’ll have a larger mess on your hands. So my approach is to experiment with touch-up paint first. If the color doesn’t match, you can always remove the touch-up paint, change the color, and experiment again. You can always spray paint over the touch-up paint later on.

If you rarely work on auto body, there is also no need to buy a buffer. I will show you a DIY buffer using tools you already have. All the odds and ends that accumulate in your garage are not really junk!
twitter


Depending on the kind of scratches you have, I will show you different options for fixing your car (rubbing compound, repair pen, and clear spray). This will give you an idea of different costs, and help you save money and avoid waste.

I will also show you the effect of sunlight and shade during different times of the day, so don’t be fooled by how the paint looks under different conditions, and don’t waste your time and money trying to match the color perfectly.

To maximize your savings, you may also need to watch these two videos:

How To Repair Auto Body Puncture & Dent | Cheap and Easy

How To Remove Front Bumper | Save $200

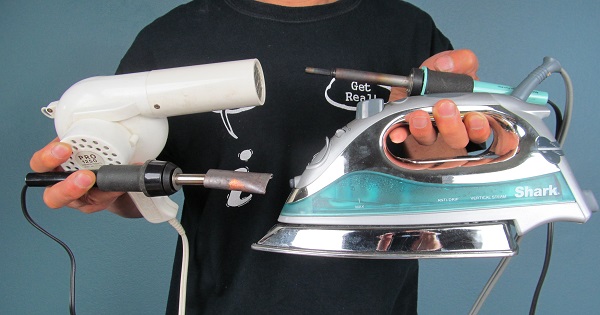
How To Repair Auto Body Puncture & Dent |Cheap and Easy

youtube

There are two issues with fixing an auto body: one is leveling or feathering, the other is painting. For leveling, we will show you methods you can use to restore the shape of the panel when you have a gradual bend and a hard bend. For painting, please check my other video for painting as this video is about fixing the punctured car body.

In summary, at the minimum we have shown that you can save $200 on labor costs even if you decide to let a body shop to complete the job. If the bumper is made of fiberglass, then I will need to use Bondo Mat and epoxy to reinforce from the back of the fiberglass. However my bumper is not fiberglass, it is a much softer material. If I glue two different materials together, it is possible it will have the opposite effect, making the crack open more. So I am going to weld the plastic crack. I will show you how you can use a soldering iron to weld it.
twitter

To maximize your savings, you may also need to watch these two videos:
If you want to paint the panel, check out this video:

https://youtu.be/yXBM6rallKA

How To Remove Front Bumper | Save $200

https://youtu.be/M6rj6_927iM

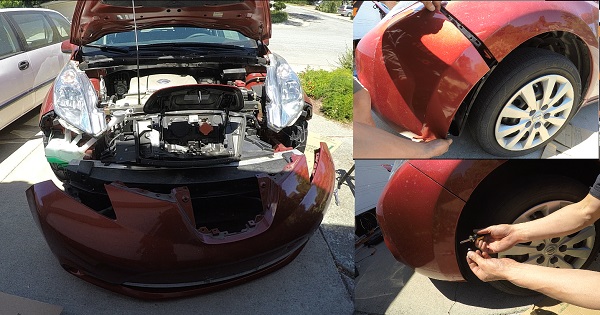
How To Remove Front Bumper Saving $200

youtube

Today I am going to show you how to remove this front bumper. Originally this was part of my auto body video, check out that video if you are interested in fixing an auto body puncture.

This video will save you money. The body shop quoted 2 hours’ labor to remove the front bumper, but you can remove the bumper yourself, and then take it to the body shop for them to fix the puncture, thus at the minimum we have shown that you can save $200 on labor costs.

My example here is a Nissan Leaf 2015. Although this video is straightforward with no tricks, I wish someone had shared this kind of idea and video when I needed it. Had I had this information, I could have reduced the time I spent to less than an hour.

There are 9 steps in this process.

twitter

To maximize your savings, you may also need to watch these two videos:

How To Repair Auto Body Puncture & Dent | Cheap and Easy
https://youtu.be/mUNDx73Y4VM

If you want to paint the panel, check out this video:
https://youtu.be/yXBM6rallKA

3rd Time Attaching Rearview Mirror– Glue attached to windshield Using 5-minute Eproxy

Just a month ago, I re-attached the rearview mirror (4 years after my first video showing how to re-attach the rearview mirror), but then it fell off again. Certainly last time was a complete failure. This time I spend more time investigating why it failed. I am doing something different to fix this time so that the previous failure would not repeat again. Last time I had two choices:
1. repeat the process of the first fix and see if it works.
2. find the reason it failed and do things differently.
Since the first choice did not work, I am now trying the 2nd this time in this video.

Previous videos of re-attaching the rearview mirror are shown below:

Rearview Mirror Repair –Glue attached to windshield
https://youtu.be/8MqFRc1JSVo

4 Years Later, Attaching Rearview Mirror Again — Glue attached to windshield
https://youtu.be/2ZC1TCsgq-g

Tags
5-minute Aproxy
Rearview mirror
car repair
DIY CAR
glue
attach
windshield
fix Do It Yourself
save money
fell off again
problem

4 Years Later, Attaching Rearview Mirror Again — Glue attached to windshield


4 years after my first video showing how to re-attach the rearview mirror, it fell off again. While I am glad that it lasted 4 years, it tells me that something is not right. I am not sure why it came off, so I will experiment more and share the results with everyone. I have two options:
1. repeat the process and see if it works.
2. find the reason it failed and do things differently.
Since the rearview mirror repair glue/kit is only $2 at Walmart, it is sensible to first try #1. If it does not work, then I will try something different.

The video of re-attaching the rearview mirror is shown below:
Rearview Mirror Repair –Glue attached to windshield
https://youtu.be/8MqFRc1JSVo